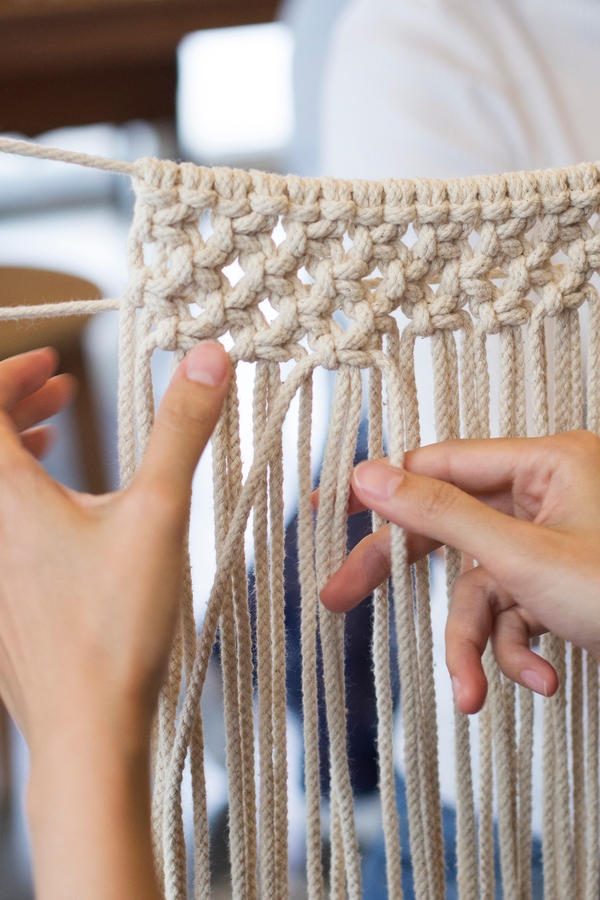
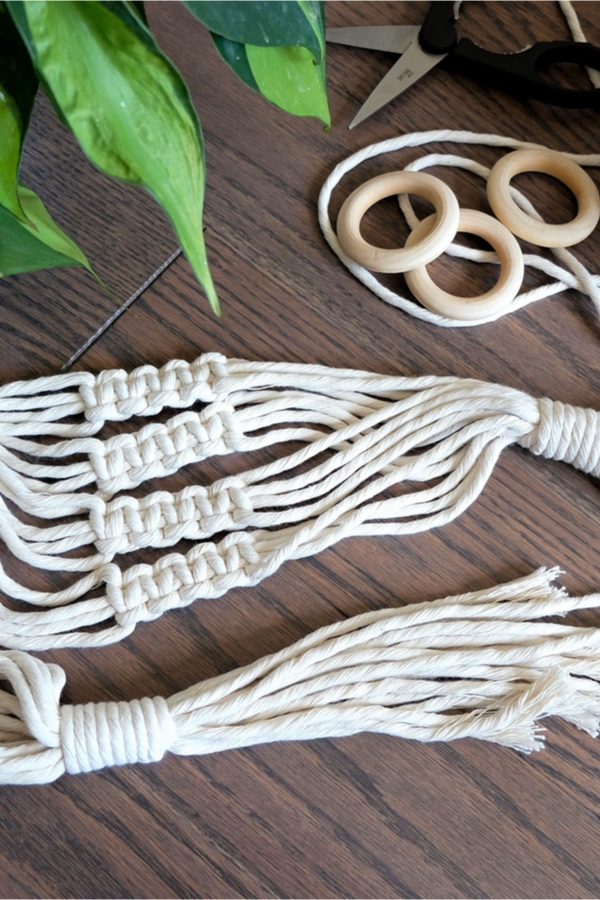
Macrame DIY can be tough to master, but with a little patience and persistence, you can learn how to tie macrame knots and make incredible projects. To help you, we’ve collected these 7 must-know knots for macrame newbies.
7 Macrame DIY Knots To Master
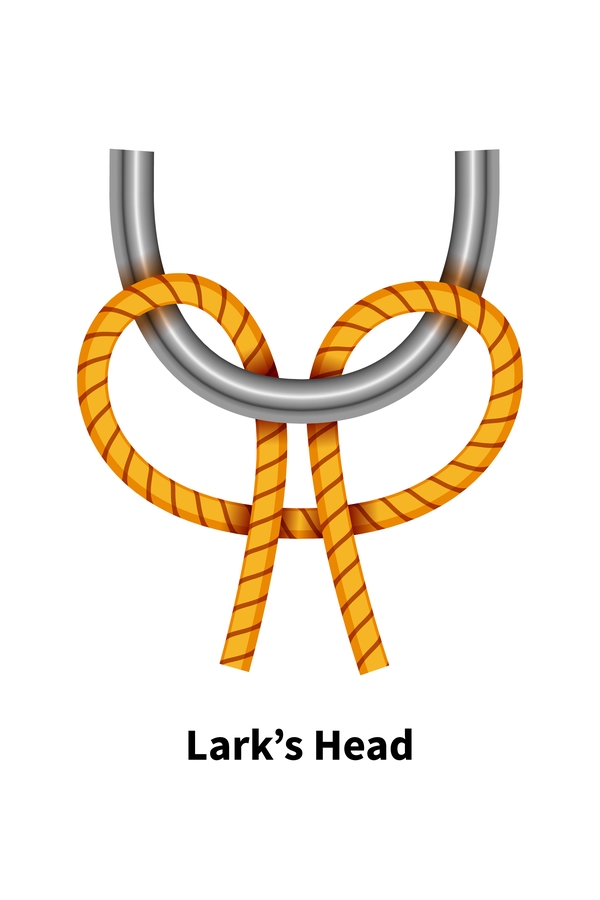
1.Larks Head Knot
The Larks Head Knot is one of the most basic macrame knots. Used for making bracelets and other jewelry, the knot connects the cord to your dowel. To make the knot, fold it over the dowel, forming a pretzel shape. Then, draw the cord through the loop pulling it tight.
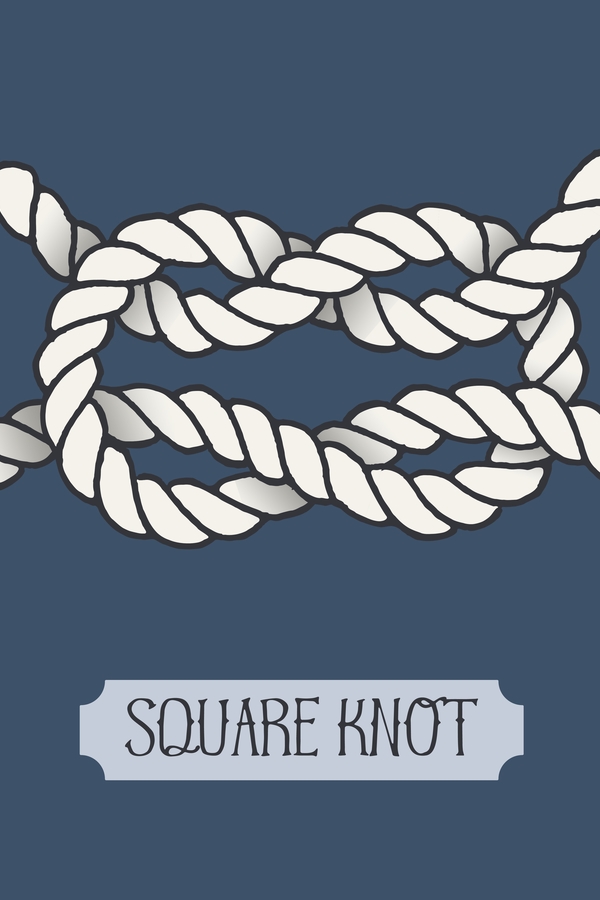
2. Square Knot
To make a macrame wall hanging, you need to learn how to complete a square knot. Start with a half knot, and once you’ve formed one loop of the knot, make the pattern another time in reverse. Start with the D cord and slide it over the C and B cords while bringing it under cord A. Then, take cord A and slide it beneath cords B and C and across cord D. For other craft projects, visit Fabric. The site features patterned fabric that you can use for sewing projects.
3. Half Hitch Knot
If you need a basic working knot, then be sure to learn the half hitch knot. This knot can be made from the left or the right. To make it from the left, hold the left-hand strand tight. Then, grasp the right-hand strand and pull it across and behind the left-hand strand. Slide it through the loop and pull it tight.
More Macrame Knots for Newbies
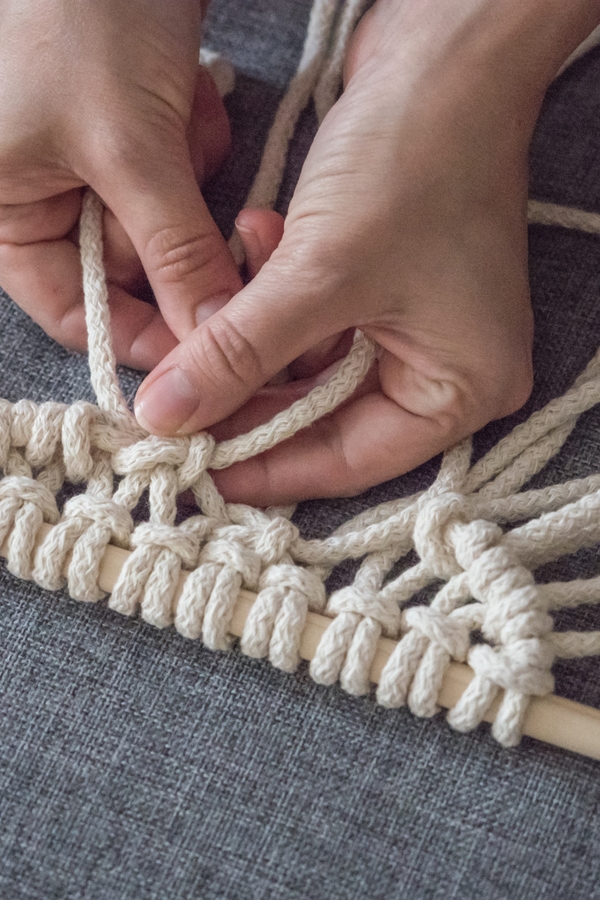
4. Double Half Hitch Knot
Macrame DIY includes learning the double half hitch knot. Start this knot with four to six cords. Grasp the first cord and pull it over the others horizontally. Then, pin it down to ensure that it remains tight. The next step is to bind two half hitches around the vertical one and pull it tight. Continue this action with the remainder of the cords.
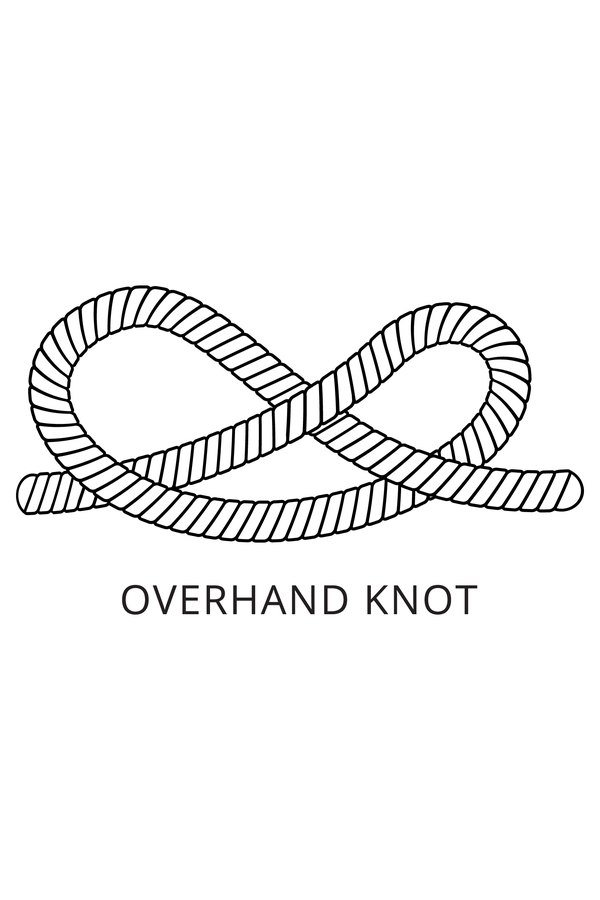
5. Overhand Knot
You’ll need to learn the overhand knot to prevent your project from coming apart. If your macrame wall hanging has two or more strings, then form a loop from two of them. Grasp the ends of the strings and slide them through the hoop from underneath. Then, tie the remaining cords in a knot over the loop.
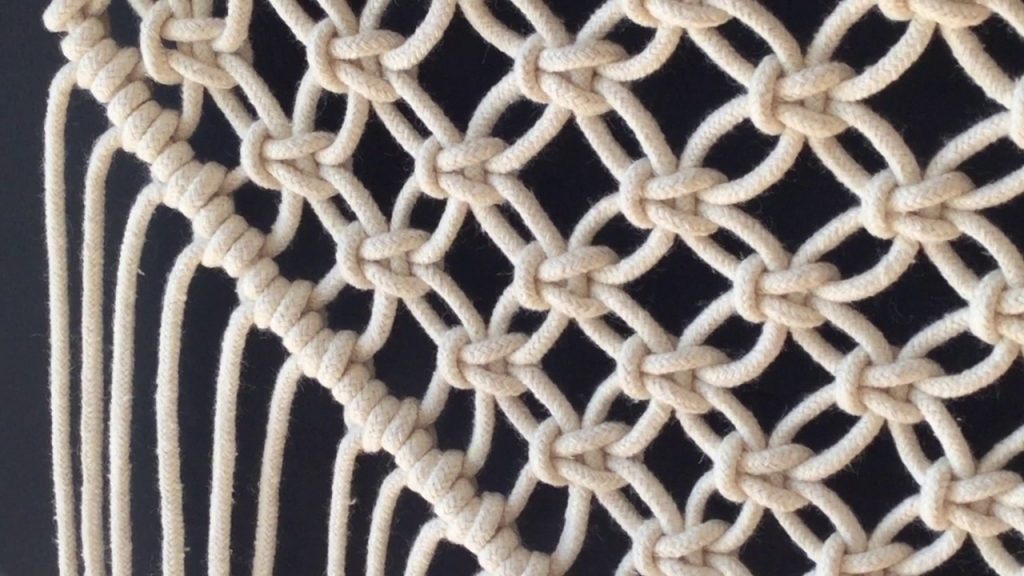
6. Diagonal Double Half Hitch
For more intricate designs, take time to master the diagonal double half hitch. This involves pinning your project’s knot bearing cord diagonally over the strands. You’ll then need to form a double half hitch around it. To form the second row, take the next strand and pin it across, turning it into the knot bearer. As you continue along, you’ll start forming diamonds and X patterns. You can purchase the materials needed for macrame projects at Michael’s.
7. Sliding Closure
Sliding closures are handy because when you use them, you can make adjustments. This is a nice option for jewelry projects. To make a sliding closure, take the end of the A cord and loop it a few times around the ends of the other cords. The next step is to wrap the A cord around the ends of the B cord. Take the end and slide it through the wraps.

Need more crafting ideas? Check out 8+ ways to upcycle t-shirts!


Leave a Reply