
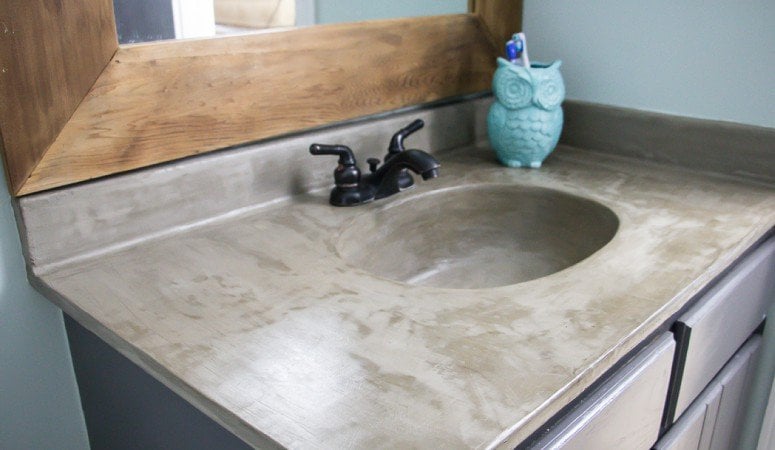
My cure niece and her new husband recently bought a new home. Well, new to them, but the house was actually built in the late 70s. It’s a great little home with some fun features but it’s the prime example of how far styles have come in the last 40-50 years! One room in particular that can really use an update is the guest bathroom. The counters are a terrible pink laminate that contrast horribly with the wood cabinets and the faucet looks more like a turkey being served for Thanksgiving than an actual faucet. After some thought, my niece and her husband decided they want to give the guest bathroom an industrial look. We did our research to know our options and settled on the rock solid idea of using concrete. It can pair with many looks and styles, it’s easy to clean, and installation couldn’t be easier. Here’s how to update your vanity with concrete
Gather Materials
For this project, you’ll need the following materials
- Ardex Feather Finish or Henry’s Feather Finish (this is the concrete product)
- 14 inch drywall tray
- 6″ Metal Drywall Knife
- 2″ Putty Knife
- Sandpaper or an Electric Sander (Such a time and energy saver!)
- Latex Gloves
- Acrylic Concrete Sealer
- 150 and 220 Grit Sandpaper
- Large Sponge
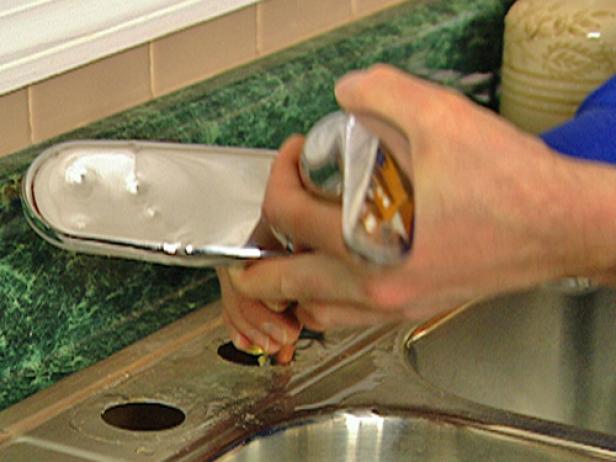
Step 1- Remove Faucet
Start this DIY project by removing your sink faucet. You can find a simple tutorial for how to do this from The DIY Network. You’ll also want to lay a cloth or tarp on the ground and line the walls behind your countertop with painter’s tape.
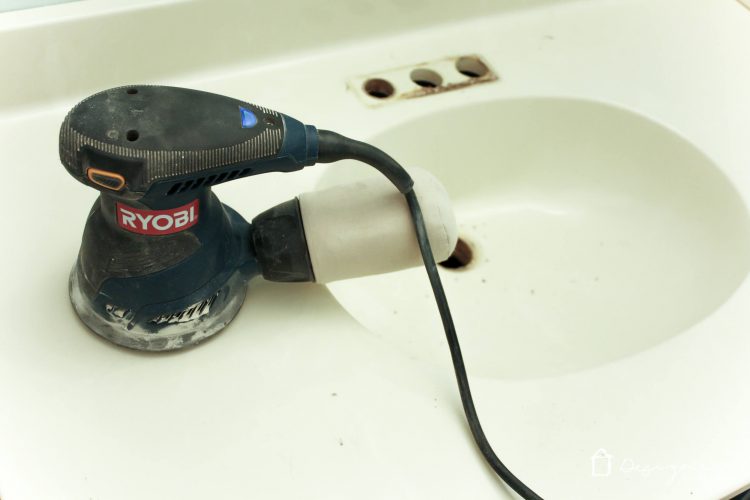
Step 2- Sand & Prep
With the faucet removed, you’ll need to sand the countertop and sink. I recommend you you an orbital sander to make the job easier and to achieve a more professional quality look. The roughened surfaces will be easier for the concrete to stick to.
Step 3- Mix Concrete
After prepping your countertop surface, use your putty knife to mix the concrete in the drywall tray. Mix until the concrete has a consistency like think cake batter. Let it rest for a few minutes before mixing it again.
Step 4- Apply First Coat
Using your 6″ drywall knife, spread a thin layer of the concrete on the countertops and backsplashes. You can use the putty knife for smaller spaces and fingers are perfect for tight corners and edges. Don’t stress about getting perfect coverage with your first layer!! Also don’t stress about any splatter. The concrete will easily wipe off with a damp rag.
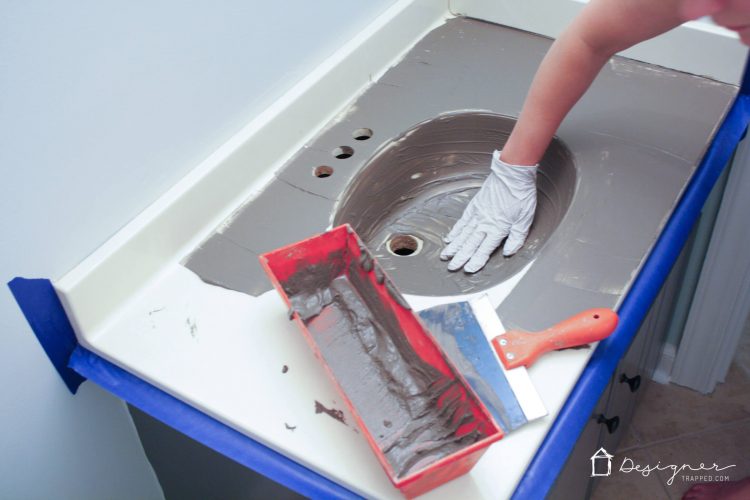
Step 5- Apply to Sink
Smear a layer of the concrete over your sink basin. You’ll need to use your gloved hands for this step to ensure that all curved surfaces are covered with the concrete. Try to spread the concrete over the sink basin smoothly but don’t worry too much about leaving visible finger tracks. Let the concrete dry before moving any further. It does dry fairly quickly but I recommend giving it about 12 hours to be safe.
Step 6- Sand
Now that the concrete is dry, use your sandpaper to smooth over any unevenness. I suggest sanding by hand for this step. However, if your concrete is more than just a little uneven, the orbital sander can also be used for the job.
Step 7- Repeat
Repeat steps 4-6 until you have your desired thickness in concrete. I’d plan on 3-4 coats of concrete before you get what you’re wanting. Don’t judge the counter by appearance at this point! The concrete will look messy but just ignore the look for now and focus on thickness of concrete! However, read step 8 to finish the sink basin with a more professional look.
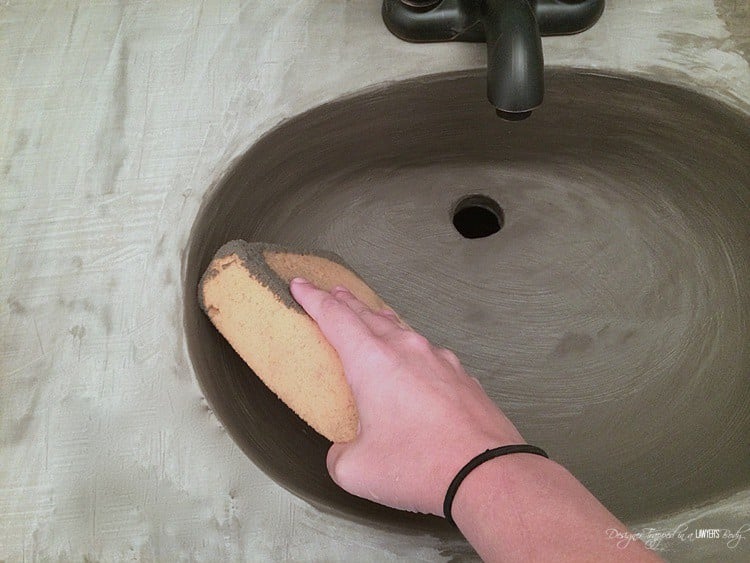
Step 8- Smooth the Sink Basin
As you’re applying your second and third coats of concrete to the sink basin, use a sponge to smooth out the cement. DON’T USE THE SPONGE immediately after applying the concrete! Wait a few minutes until the concrete has stated to set before taking the sponge to the cement. Don’t forget to dry and sand between each coat of cement.
9. Step 9- Apply Sealer
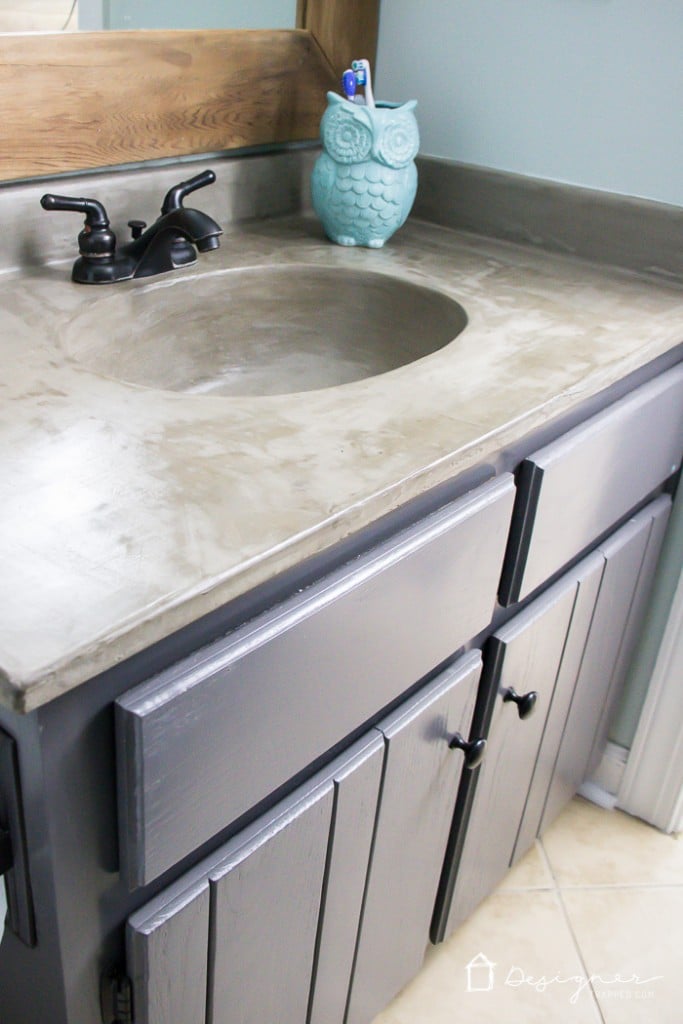
The next step is to apply a concrete sealer. This will add a smooth, darkened, and more aesthetic sheen to your countertop and sink. The sealer goes on milky but, like glue, will dry clear. Take this process slowly, being sure not to leave puddles and to pop or blow out bubbles as they appear. It’s recommended to apply two coats of sealer. Also be sure to apply extra sealer around the INNER edge of your sink drain holes so that water will not seep into your concrete. After the sealer has dried, you can install your new, updated faucets.
10. Enjoy!
How easy was that!? If you can handle a paint job, you can handle updating your fantastic new concrete vanity! We also plan to refinish the cabinetry in my niece’s guest bathroom to pull the whole look together, but that’s another tutorial for another day. As for this DIY job… you have to admit, you ROCKED it 😉
Images sourced from Designer Trapped.


Leave a Reply